
How To Display Disney Pennies and Pin Badges
/Disney pin badges and collectable pennies are some of Walt Disney World’s most popular souvenir items. We collected 35 pennies from around the Disney parks on our last trip to Florida and we bought a few more souvenir pin badges to add to our collection.
If you’re anything like us, you don’t feel like the bottom of your drawer is the best place to display your collection. So, instead of re-discovering your pins and pennies each time you do a deep clean, why not display them more openly instead.
Displaying Disney Pressed Pennies
Disney’s pressed pennies, which you can get at numerous points around the parks, can be nicely displayed in a frame of an appropriate size for your collection.

Step 1: Pick A Frame Size
For our collection, which consisted of 35 pressed pennies, a square frame which had a 10.5”x 10.5” (26cm x 26cm) visible area (aperture) worked very well (check out these ones on Amazon).
Step 2: Decide on a Display Pattern
You can, of course, display the pennies in any way you like. We tried to avoid the relatively dull grid shape and aimed for a more creative pattern. Since our collection consisted of 12 horizontal pennies and 23 vertical pennies, we found this diamond pattern (with corner frames) suited nicely.
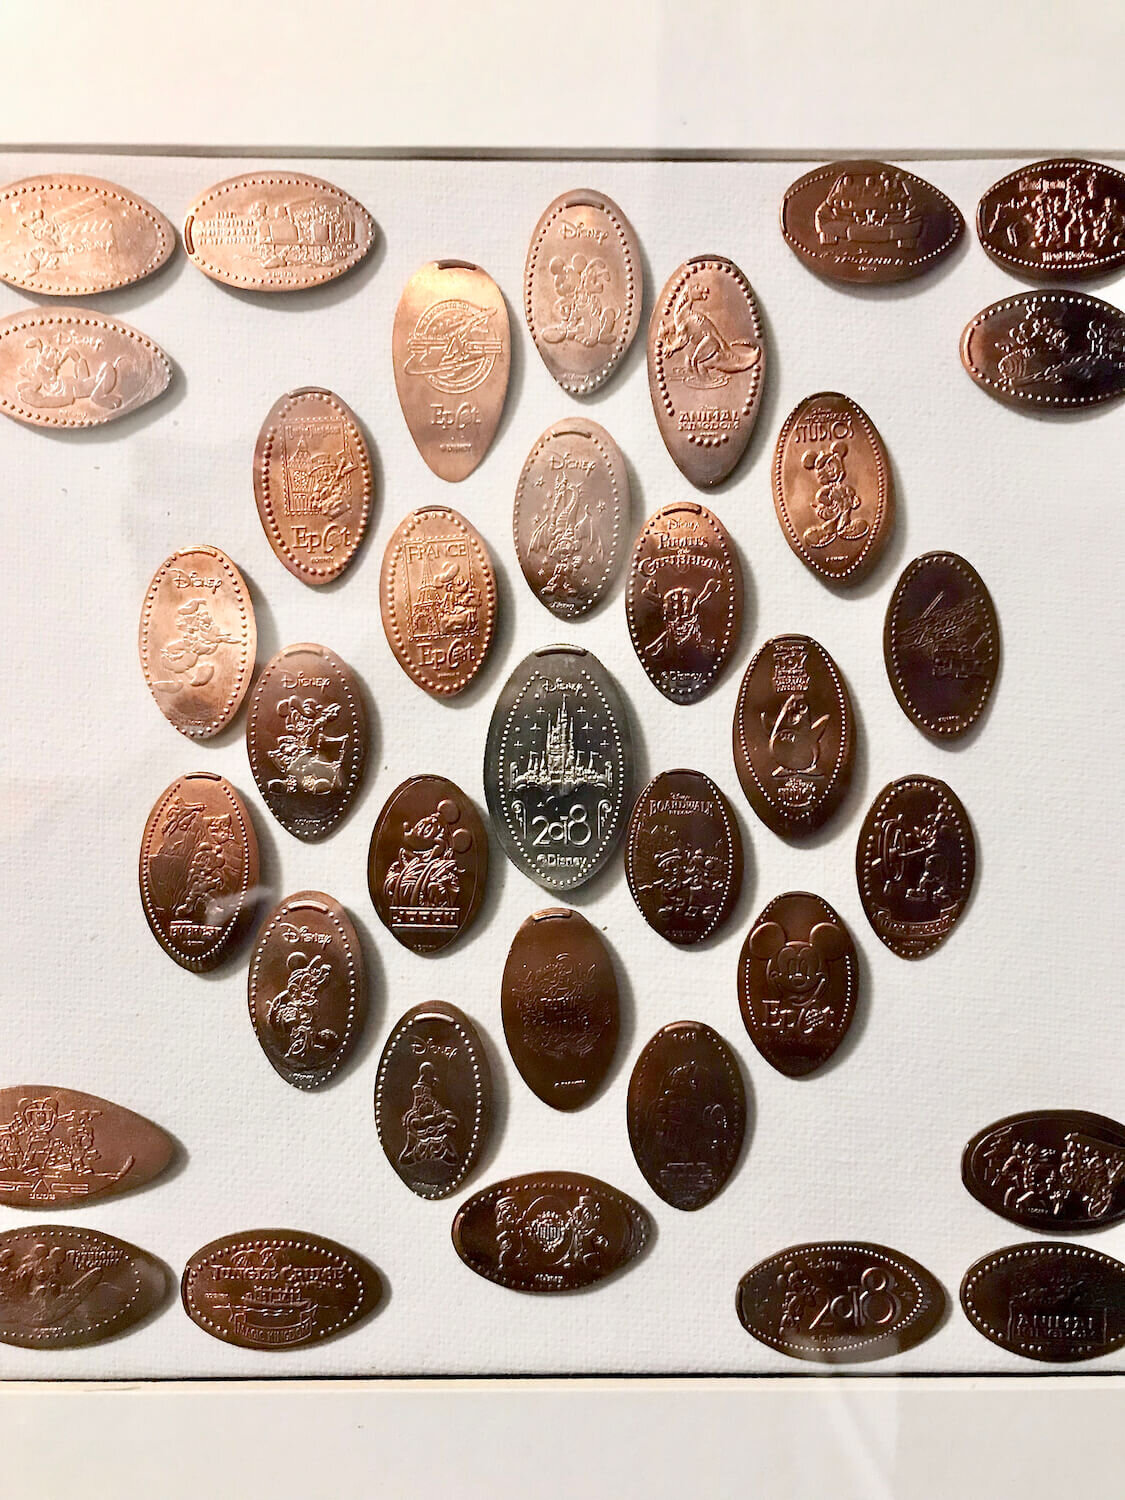
We also made sure to put the 2018 pressed quarter pride of place right in the centre. It’s a good idea to lay out your pennies on a table first before you stick any in place.
Step 3: Clean Your Pennies
We always tried to press the shiniest pennies that we had (we even asked Disney cast members to swap out some of our older US cents). But some will inevitably lose their shine by the time you get home.
Here’s where an eraser comes in handy. Erasers are surprisingly effective penny polishers.
Step 4: Stick Your Pennies in Place
Mounting your pressed pennies is also a simple process. White tack was our method of choice. Why white tack and not blue tack you may ask? It just blends into a white background a bit easier. A bit of white tack sticking out from underneath your penny will likely go unnoticed.

Once you’ve stuck down your pennies, secure your display board into your frame and you’re ready to display.
Step 5: Display Your Frame Of Pressed Pennies
Most frames, like these, will come with a mount on the back for wall-hanging. If this isn’t the case, or if you don’t want to damage your walls with a picture hook, I’d suggest looking into Command Strips. The standard strips can hold a lot of weight but are also easily removable, leaving behind no wall damage.
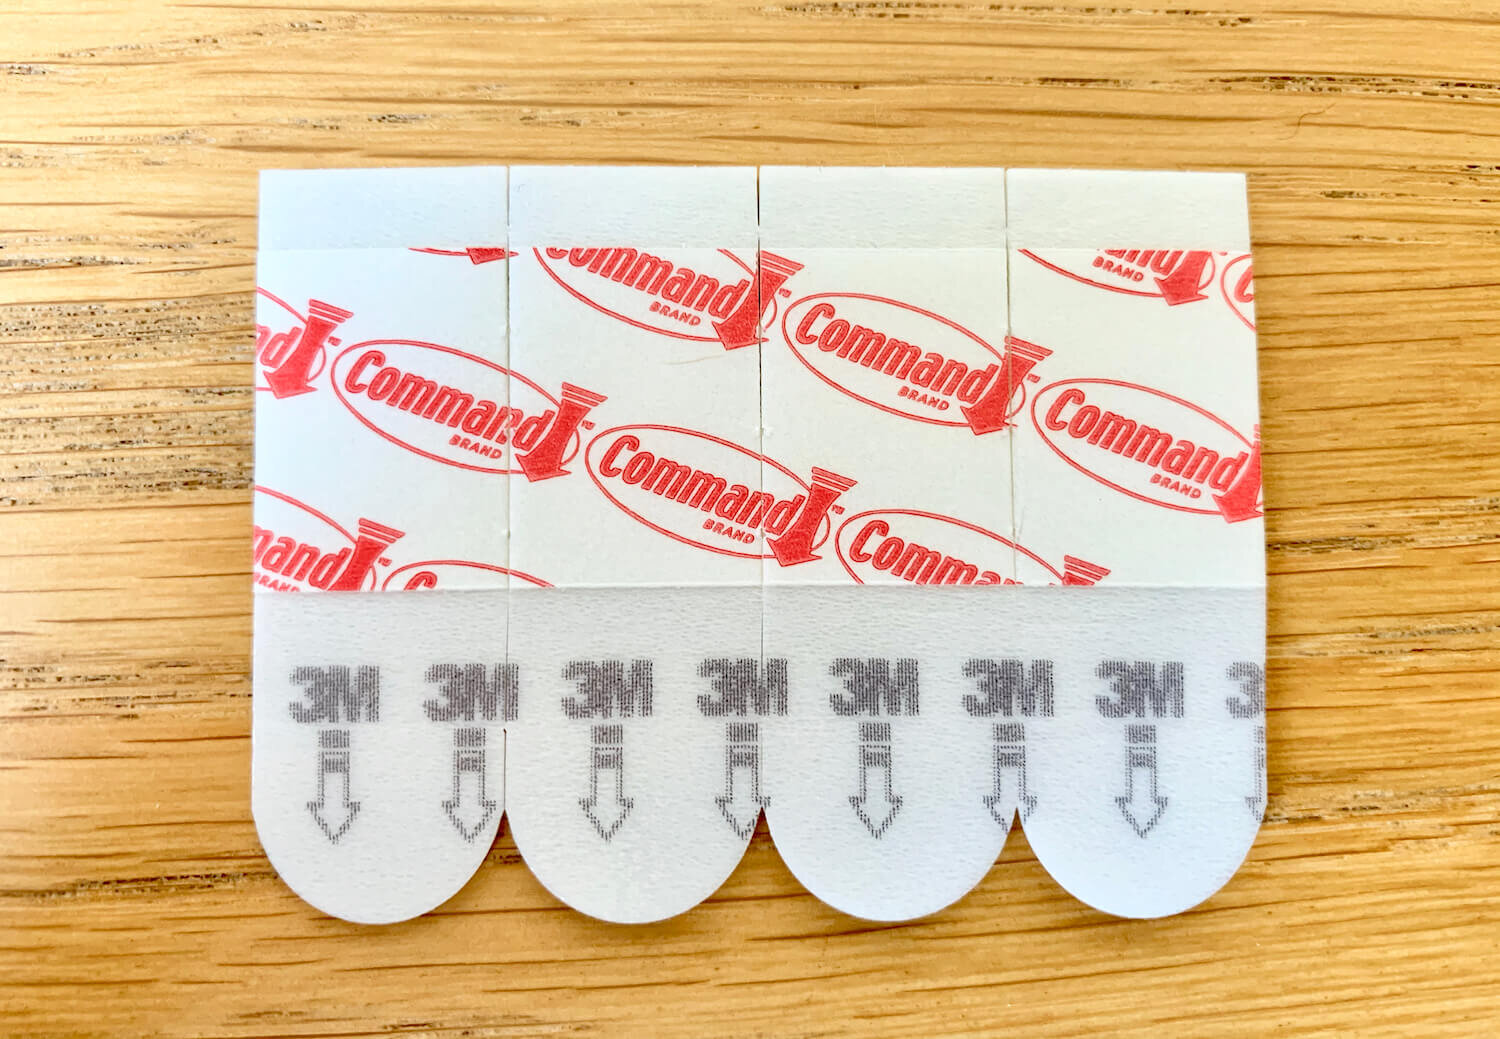
Alternatively, if you’re looking for a hook, Command also make picture hangers, basically strong but easily removable hooks which stick on to your wall.
Displaying Disney Trading Pins
We wanted a uniform look to our displays so we basically took the same frames we used for our pennies and used them to display our Disney pins too.
Step 1: Pick A Frame Size
This will vary depending on the size of your collection but allowing room for growth is always a sensible approach to take. Damon has a much more extensive Disney Pin collection than I do but we both displayed them in frames with a 10.5”x 10.5” (26cm x 26cm) aperture (visible area). Check out these ones on Amazon.
Step 2: Decide On A Display Pattern
Display your pins in a way that’s personal to you. I decided to display my 25th Disneyland Paris anniversary pin in the centre of the frame. I then tried to create a sense of symmetry by matching pin shapes on either side of the centre line (eg. the circular Pirates of the Caribbean pin on one side and the circular Star Wars pin on the other.

Damon’s frame includes a larger WDW Pin in the top centre, with 4 smaller pins representing each of the 4 main parks underneath.

Some Other Display Ideas:
Order of Release - For the Disney history nerd. Display your pins in release order (old to new).
Park Clusters - Separate your display into park subsections (eg. Animal Kingdom, Epcot etc.)
Character Clusters - Separate your display by Disney character (eg. Mickey Pins, Donald Pins, Chip and Dale pins etc.)
Step 3: Mount Your Disney Pins
Thankfully, Disney pins come with their own mounts so all you have to do is pierce your frame’s cork board to secure them in place. Whilst the standard Disney pin backs are perfectly suitable, if you’ve lost any, or if you’re looking for something more secure, these locking pin backs are a great product.
Step 4: Display Your Disney Pin Frame
As I mentioned above, most frames will come with a mount on the back. If there isn’t a mount, or if you want to avoid hammering picture hooks into your walls (tenants, I’m looking at you), then you should look into Command Strips.
Standard Command Strips can hold a surprising amount of weight and can be easily removed without causing wall damage. Command Picture Hangers work the same as normal hooks, if you have a frame mount, but they also just stick to your wall.


Looking for a fun way to tour Walt Disney World without the kids in 2026? Here are our top 3 complete Disney World Bar Crawl experiences with unique souvenir printables for each one.